
Adding new members
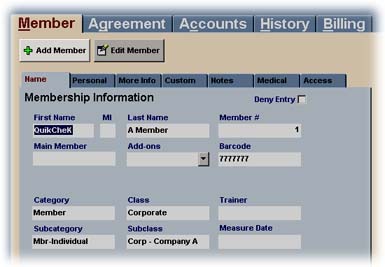
1. After you login to QuikCheK, select the Members module. You will see a Viewing name at the top left of the screen, and all the demographic information for that member.
2. Clic the File
menu, Select Add
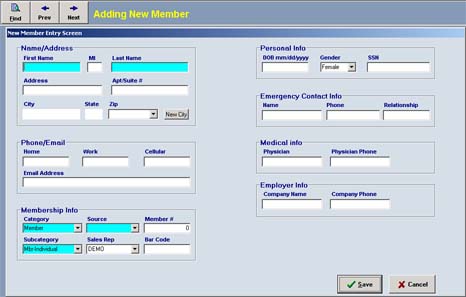
3. A blue screen pops up. You will see the message Adding
new member in the top left of your screen. You can
now enter the new member's information. If you are in a hurry, you can only
fill out the minimum required fields, which are highlighted
in Cyan. If you wish, you
can Edit the member's information later to add more details. When you're finished,
click the Save button.
Key Points to Remember:
• You do not have to assign a member number, QuikCheK auto-increments and assigns the next number available. (if you have your own numbering system, you are welcome to assign member numbers accordingly)
• In a hurry? The only fields required before you can save the new member, are the 'First name, last name, source, category and subcategory'.
• Always use 19 in your year of birth! If you type in 01/16/65, QuikCheK will save it as 01/16/2065.
• ENTERING ADDONS - When you enter Add-ons you don't have to enter address/tele info…after you save the add-on, choose Edit. Click the Main Member drop down field, and start typing in the last name of the main member. When the main members name is in the field select Save. Right click on the 'main member' field and select 'synchronize with main member'. All of the address info and telephone numbers from the main member will be copied to the add-on members record.